SAT-TRAC – Part 6 Adding a Brain and I/O to the SAT TRAC remote
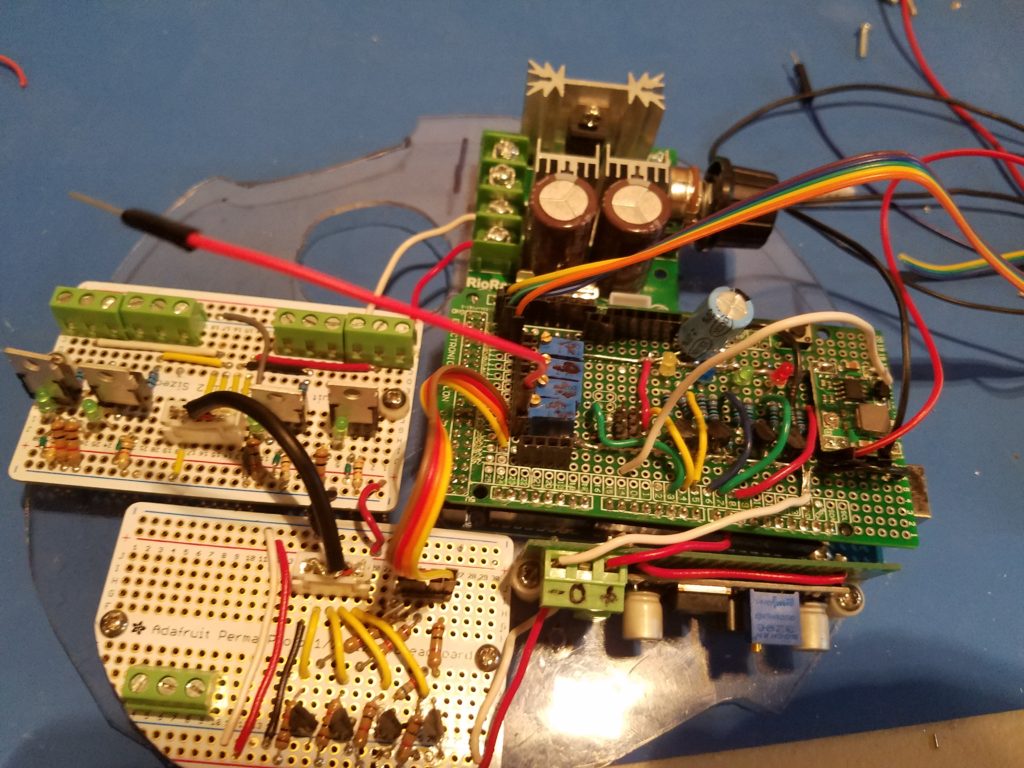
Wow, you still with me? In part 5 the RC control was established and proved to be viable. However, the lack of enough I/O was an issue as well as space on the remotes 8-inch diameter Lexan plate was limited. My answer was to replace the Nano with a Mega 2560 and use a top hat to accommodate the control and interface circuits on the Mega. Also, the extra power supplies to take the pressure off of the Mega were mounted vertically with the adjustment pot in a handy position.
Breadboarded RC control is installed on a top hat. Blue pots on the Mega hat will interface with various board voltages. The ribbon cable at 12 o’clock connects to the Nrf24L01+. The ribbon cable at about 6 o’clock connects the Mega to the power control circuits which will operate the FET switches. Everything is mounted on a Lexan board with an approx. 8-inch diameter. Note: at 3 o’clock is the 3.3v power supply to the RF transceiver, and at approx. 5 o’clock is the vertically mounted power supply to feed in 10v into the Mega’s Vin pin. Note: 11/6/2019… to feed in 7.5V fed into the Mega’s Vin pin. This lower Vin to the Mega 2560, reduced power consumption and ripple from the onboard regulator. Reducing A/D jitter on the analog input lines. To futher reduce any jitter on the A0 & A1 input lines for AZ & EL control, I installed a dedicated 3 amp adjustable power supply to keep inputs steady as possible.